

AREA 88: "The Olive Grove" (CH-54 Tarhe)


Comments
2 15 May 2019, 14:22
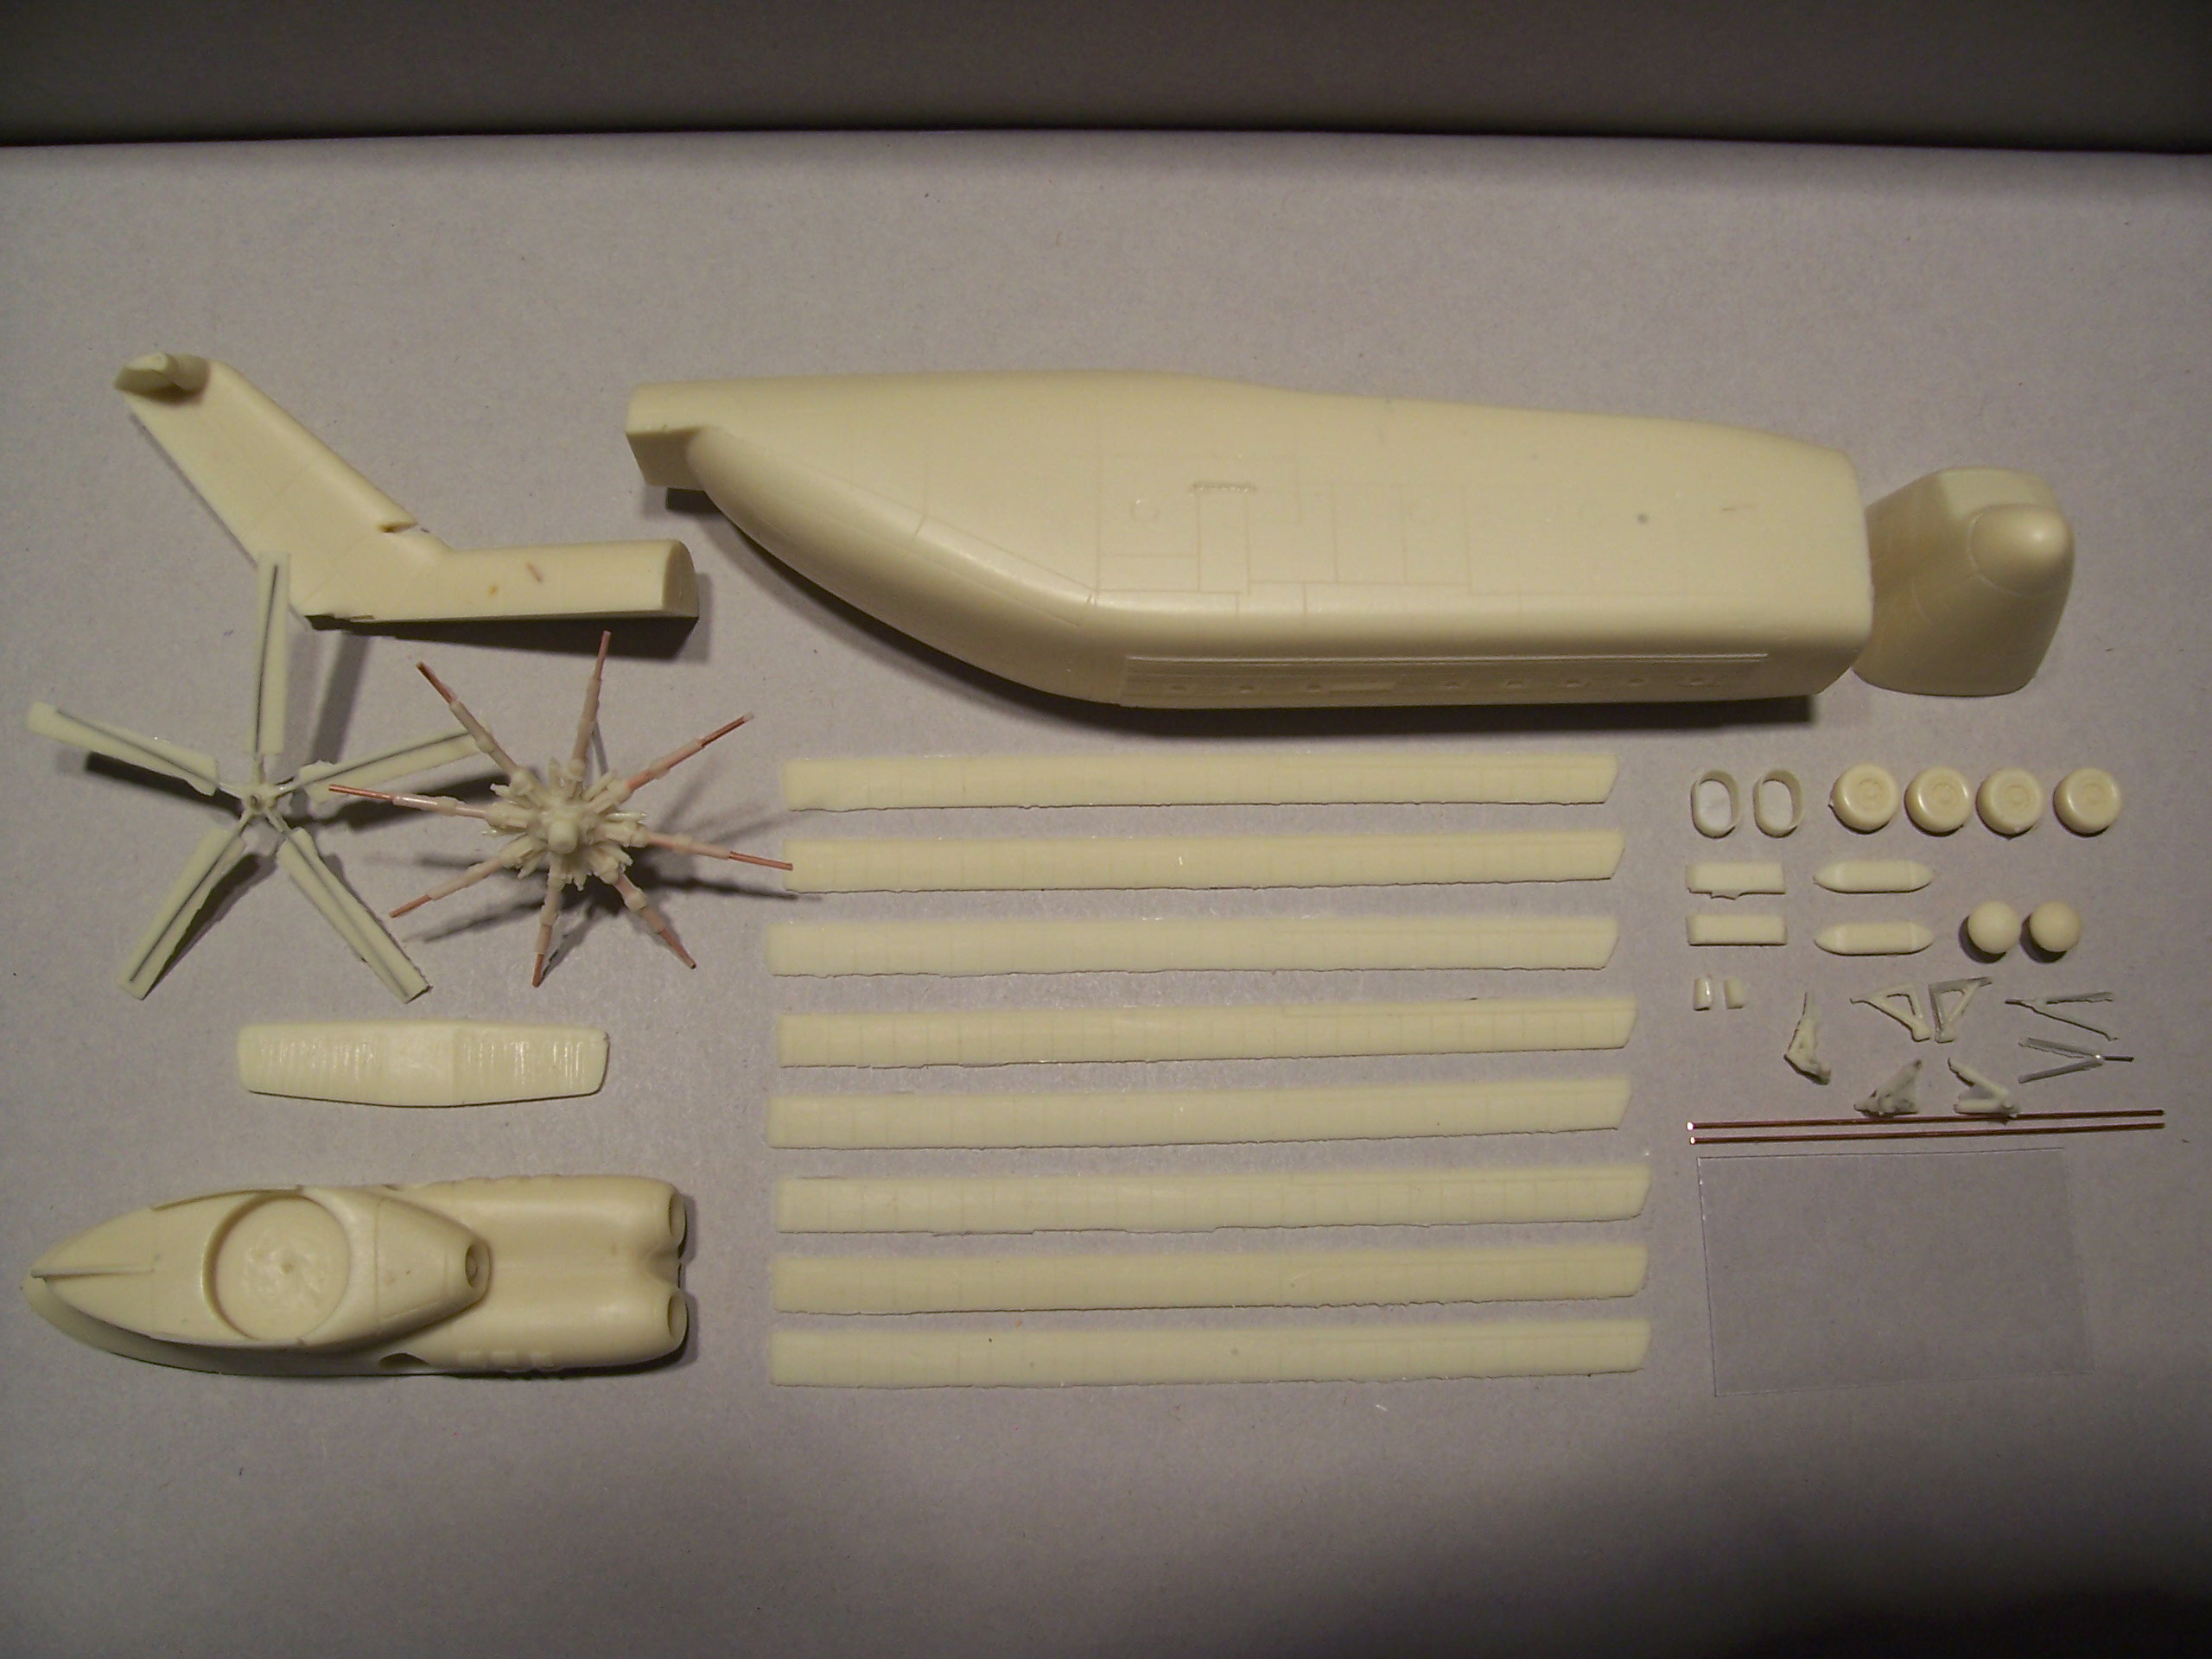
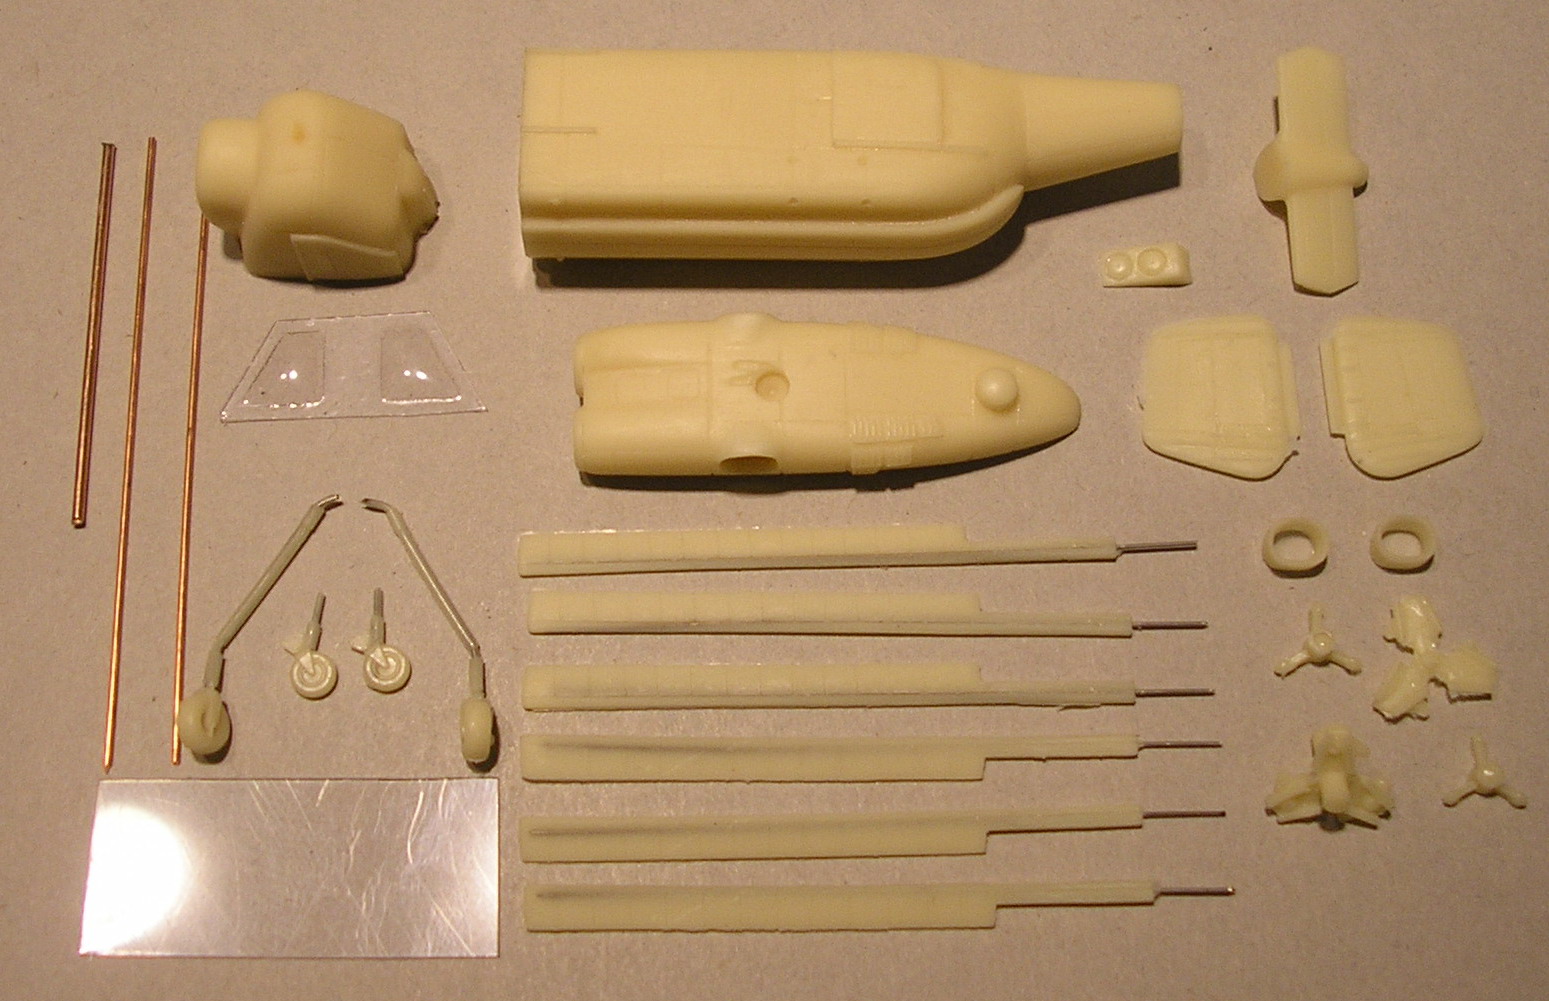
Ok... so all the parts are here. Of course there's no instructions, so it's hard to be sure...
...
..
.
Now what do I do? I'm thinking I might need to crowd source this one a bit...
15 May 2019, 14:26
After looking at it a bit, I think there's no danger to glue on the main part of the legs to the body... nothing seems fiddly there.
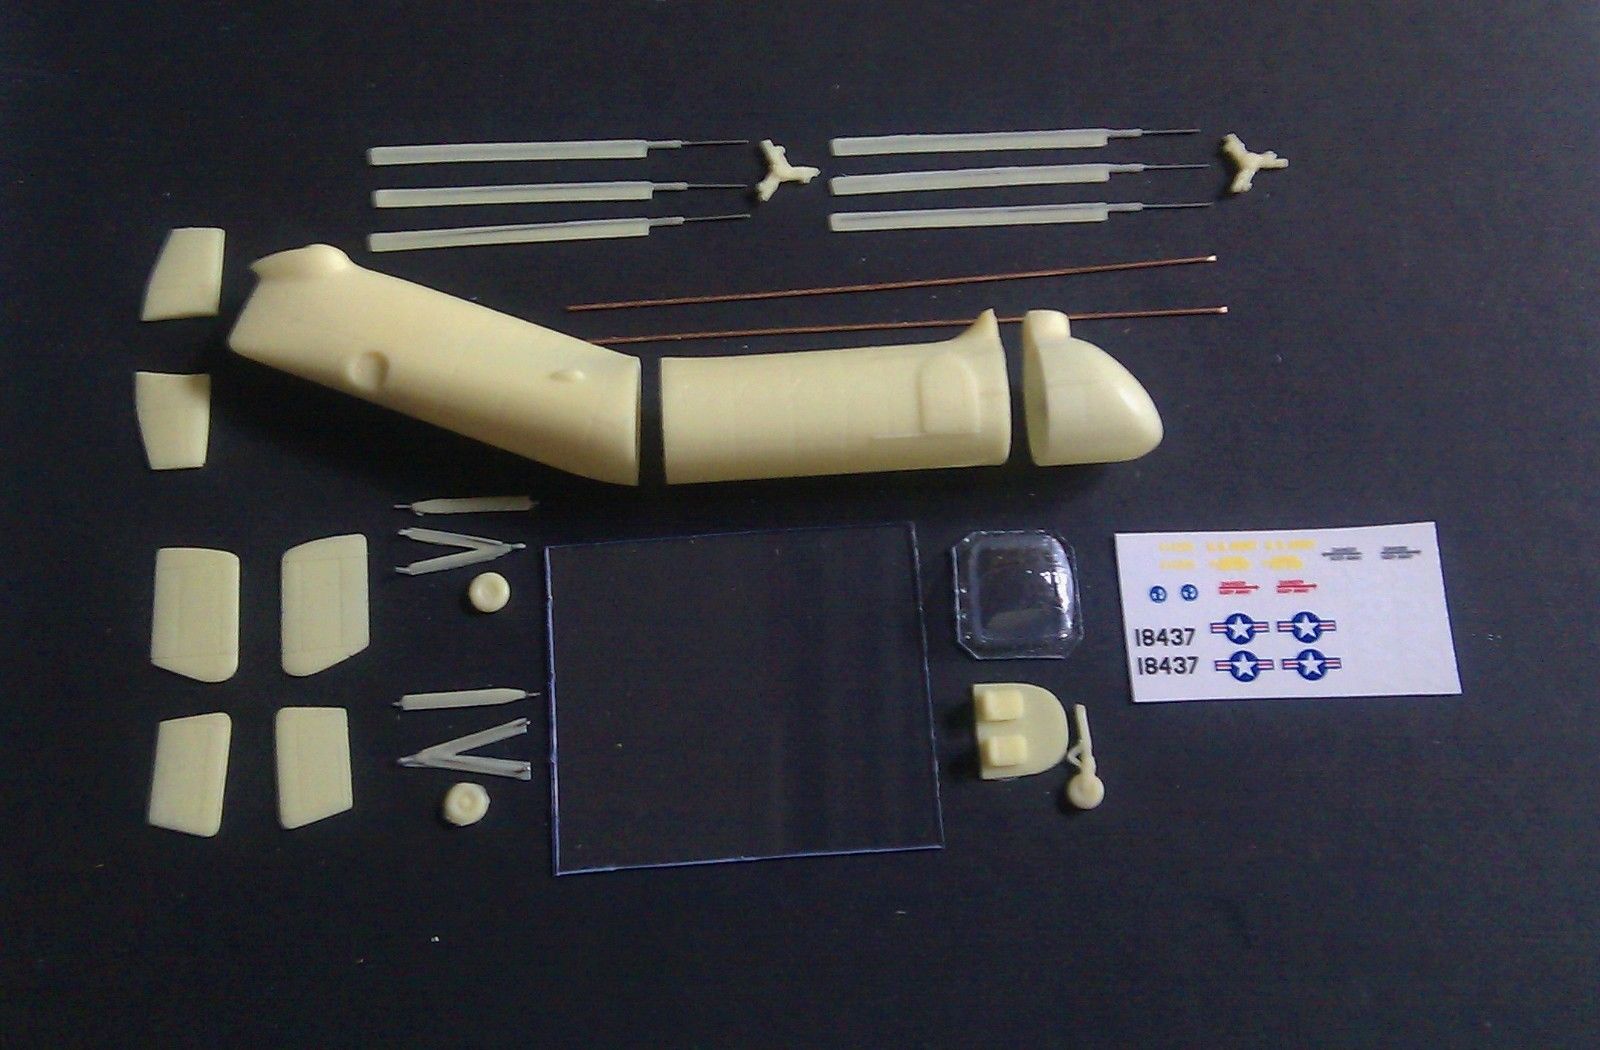
I also think there's a choice to be made... use the resin closed cockpit, or the vacuum formed clear one... that might be where to start.
15 May 2019, 14:30
I once built a Revell 1/72 Tarhe. Wouldn't the instructions be here on Scalemates, so you can use those to check?
15 May 2019, 14:46
")
Honestly, at 144 I would just go with the resin nose and blacked out windows.
15 May 2019, 16:01
Nice and interesting subject, I'm in !
For the cockpit... the clear part seems to be quite ugly, so I would go for the resin nose.
15 May 2019, 16:07
241 photos and a video walkaround may help
net-maquettes.com/pi..ikorsky-ch-54-tarhe/
16 May 2019, 12:58
I foresee a lot of drilling if motorising the rotor - and how on earth would you get a pulley or something into the tail of 1:144 resin
16 May 2019, 13:10
What volume is this partofthe story in? [mustgetanewkeboardthespacebaristurningancientgreekorjustplaindying]
16 May 2019, 13:11
So, after a bit of a test, i'm Confident I can insert a motor that will be small enough to fit within the rotor housing/fuselage. Shouldn't be too much drilling... one hole down from the top for alignment, and a larger one from the bottom up to slide the motor in. Only the thin wires should be visible in the end.
I was feeling confident, so I got the main part of the legs on, and the tail, but then I stalled. I still haven't figured out where all the small parts go yet. I'm also a bit confused by the cabin. The vacuum-formed bit is shallower than the resin part, so i'm wondering what's supposed to happen here. There's a bit of clear plastic sheeting, which I assume is for the pod windows, so I'm guessing the vacuum formed parts are for the same. Do I need to drill and trim out the windows on the resin and then cut out and glue in the clear panes from the vacuum form?
16 May 2019, 23:42
when looking at the parts, isn't it possible to keep a part of the resin cabin (Cut off the front) and keep the rear, so you have some resin to glue to the body of the chopper? Then the other vacformed piece to the rear of this part? Just my 2 cents. When it isn't clear, I'll try to make a drawing...
17 May 2019, 09:10
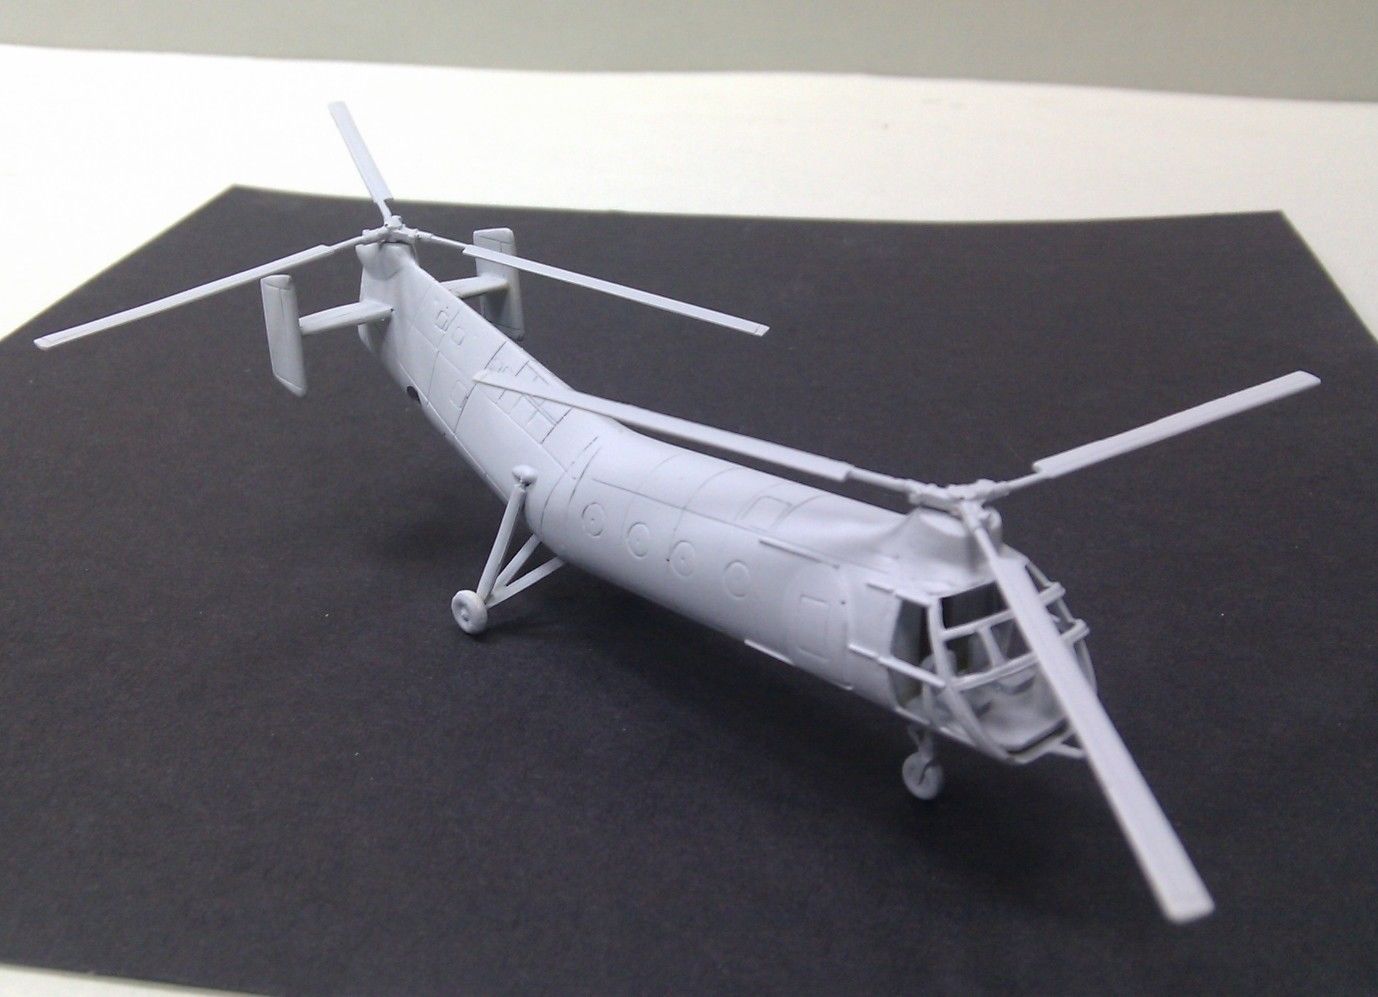
looks like you are ment to cut our holes in the resin to insert the vac too parts to me. examples of their other kits [img1] [img2] [img3] [img4] [img5] [img6] I notice they haven't tried glueing it in on their own builds

17 May 2019, 11:08
Argh, forgot to post the instructions. I promise I will do so tonight.
17 May 2019, 13:05
Yeah... that was my first thought. Let's try that first... if I butcher the windows, then we still have a chance to try to glue the whole thing on the front. I'm feeling a bit confident because I was able to drill out a nearly perfect slot for the motor.... so let's roll some dice!
17 May 2019, 13:07
No worries Don. One of the Revell kits has instructions... which only partially helped since "resin blob" is not clearly marked...😉
17 May 2019, 13:09
Glad those rotors have rod in them otherwise they would have broken when I sneezed
17 May 2019, 13:10
Geez Matthew... no pressure! I'm well aware of the replacement price and tag!😉
I carefully started cutting out the windows, and even though it's slow going, I feel we're heading down the correct path. Let's hope! Thanks for the support though, you've been a giant help on lots of my builds lately. It's much appreciated!
17 May 2019, 14:37
It's a long way to go before I'll be ready to call it...😉
I'm still having some trouble figuring out where some of the parts go. In the latest pic I know where everything should go roughly except the pieces along the bottom. There's a little box with wings, and a pipe (that goes up near the rotor, but attached to what?). There's also a few mysteries on the parts held together by flash. I can figure out the three wheels easily enough, but the wire "V" shaped bits i'm guessing are the four anchor points that go on either side of the legs along the fuselage. But the two hammers and the four little squarish bits are a complete blank.
17 May 2019, 15:00
V-shapes (small) oleo scissors main legs, Hammers seem to be mounted right behind the engines, connecting to the main rotor gear box, squarish plates, on the revell box, there are some plates behind and above the engines: scale-rotors.com/gal..skycrane-revell.html
17 May 2019, 15:48
OK, perhaps these for the pieces in the middle. Still trying to figure those rhomboid looking parts
[img1]

18 May 2019, 00:04
That's what I thought as well, even though those ones have three legs and these are only two (or three if I find some wire). I'm glad I'm not the only one who's not quite sure what to do with all these bits and bobs.
18 May 2019, 00:32
Did you try to contact the company: ruporator@yahoo.com? Only thing that comes close for the rhomboid structures, are the guards in front off the engines... Quite expensive stuff on their site, but looks very nice
18 May 2019, 06:22
Ok. So, after some careful looking and studying, I've come to the conclusion that the 4 little bits I couldn't figure out are, in fact, un-used extras. They don't appear on the website/eBay parts photos (although apparently I didn't get a full complement of brass wires either... but I can work around that easily enough). The only one of the three kit versions to list the parts is the Daisy Cutter, but their location in the mould leads me to believe that there was no real point in trying to remove them.
With that settled, everything else now makes sense. So I glued a few more of the bits on, lest they become wayward snacks for the carpet monster, and I kept doing surgery on the cabin windows. So far (SO FAR) I've only snapped one bit of framing, but it was easily replaced with a bit of styrene and some CA glue. Still some more windows to drill out, so... fingers crossed!
20 May 2019, 23:32
Ok. Back at this one now... got some of the clear parts cut out CAREFULLY and glued in place with the resin parts. It's some tricky patient business, but so far so good... (famous last words!)
5 June 2019, 15:07
Can't be any slower than my projects - I've a star wars A-Wing I started in 1996
6 June 2019, 17:04
I hadn't! But that's the great thing about Greg: he never disappoints the audience! He can go on a spree of 3 or 4 parallel builds for the same collection, or resurrect a long forgotten project, or come up with something completely different but devilishly original!
3 April 2020, 00:17
Hah! Thanks Alex! The show must go on! There are relatively few projects I've actually abandoned, but sometimes they get pushed aside for whatever reason. I'm working on this project, my Macchi C.202, and my Area 88 dual Crusaders project actively. But I've got a couple of 1/72 Tintin projects that need some love as well, so they're likely up next.
Anyway, I uploaded a new pic to prove this project has been rescued. Cutting out tiny vacu-formed windows and carefully putting them in frames cut out of solid resin is a challenge, but we're almost through those rough waters. So I anticipate smoother sailing on the other side... 🙂
3 April 2020, 00:30
We're starting to get on a roll now. After I got all the windows cut and inserted, things became a lot easier. The cabin is now attached and I can start figuring out where all the bits go. With absolutely no instructions, it's a bit of a mystery, but I think I've got it. I added some extra wire to give the load-bearing hook holders a third leg. I also had to just sort of guess on the tail - but I added some wire there for support struts.
5 April 2020, 15:30
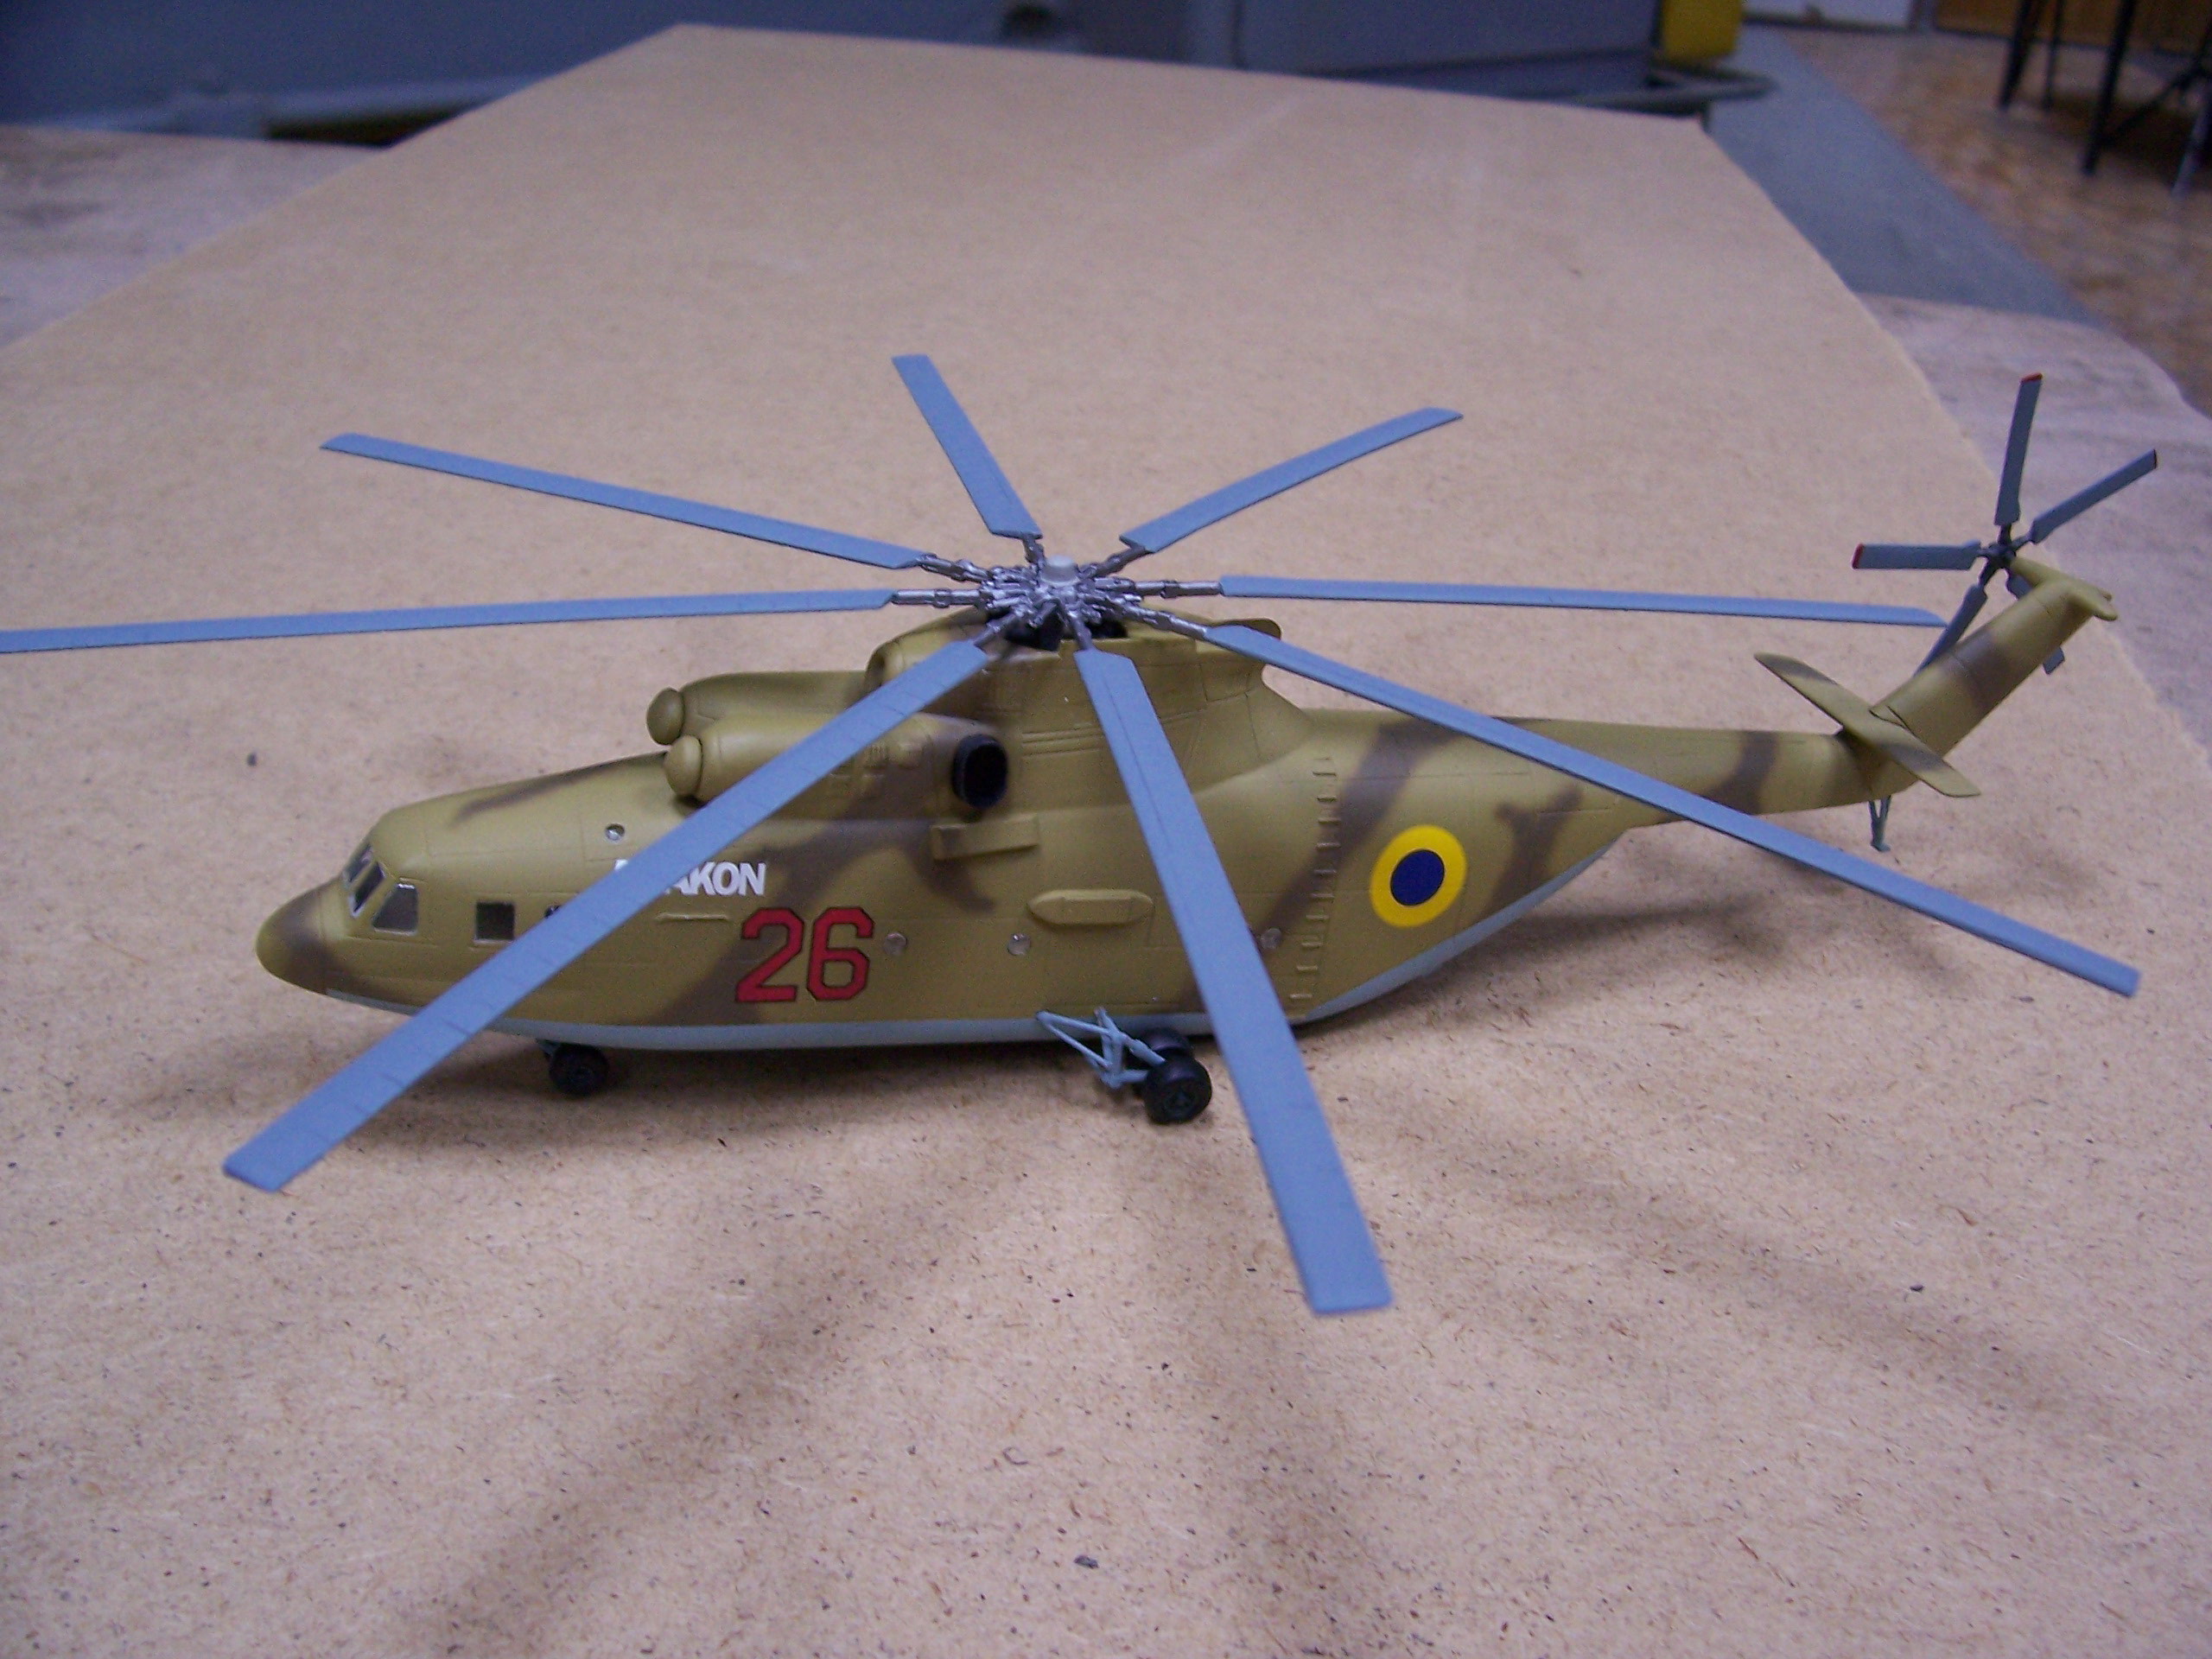
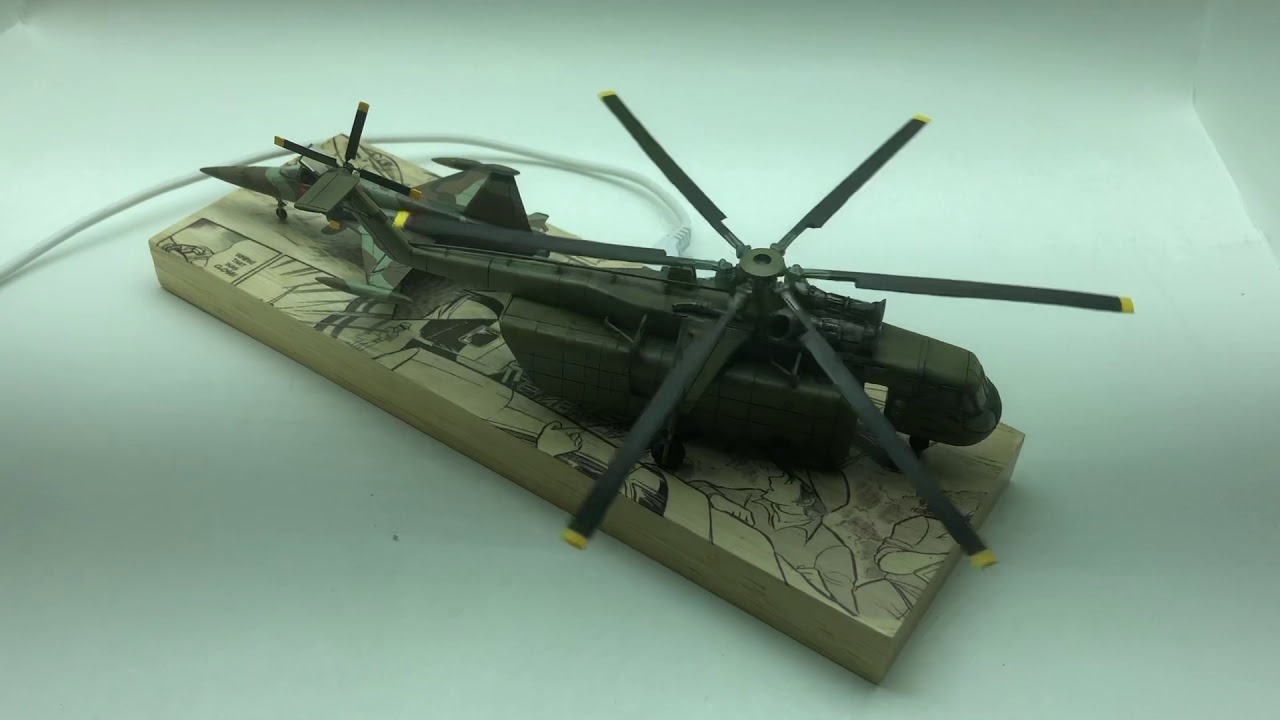
So what colour do you paint a CH-54 that only appears in a B&W manga? Well, the name of the project is the Olive Grove... so there really is only one colour...😉
Amazing how that first coat of paint never seems to take any prisoners, though, innit? Needs some sanding touch ups.
8 April 2020, 00:52
Ok, we're all wired up and spinning! We're now rolling down the other side of this project towards the finish line.
17 April 2020, 15:27
We're getting close.. might work better if I put some blades in the propeller though...😉
17 April 2020, 15:34
Thanks guys! This one was a long time coming, and I have to admit... that resin CH-54 kit cost more than I usually want to spend, so I tried to make an extra effort with this one. To that end, I decided that, since it was landing, I should try to slow the rotor down. I almost slowed it down too much by having too high resistance on the 5V circuit, but after a bit of fiddling to make sure it doesn't rub on anything, it looks like it worked.
Youtube Video
19 April 2020, 16:09
The little F-5 is seriously jealous of the spinning rotor, turned away and won't look that way for anything in the world!😉
Great finish Greg! 👍
19 April 2020, 17:44
Wow! You wrapped that up quickly once you got back to it. And, as always, fantastic job.
19 April 2020, 17:44
Thanks guys. You're right Slavo... the indignity faced by a sleek jet fighter having to get a ride back to base in the trunk of a lumbering helicopter. They probably had to blindfold it.😉
Don, after cutting out and glueing in all the tiny windows, there really wasn't much else to it. It's just a stick, a block and a rotor. I didn't dare to let it stall again though.
And thanks for the watchful eye, Erik. You'll notice in one of the pics I broke the motor wires. Lucking there wasn't really an "inside the fuselage" this time, and I had a spare, so it was easily just replaced. Oh, that they were all that easy. I did almost solder the wires to the base backwards - which usually doesn't matter that much to me since they're spinning so fast you can't tell. But with this one spinning so slowly, you really don't want to reverse the rotor spin. I caught it by doing "one last test" and I'm glad I did.
19 April 2020, 22:31
OK, so my blog is updated - strobez.ca/wp/index...rove-pickup-area-88/ - feel free to check it out to see all the pictures and read a few pages of the manga upon which this project is based.
20 April 2020, 02:43
Hehe... yeah. That always makes me smile. When I visited Athens, the people seemed pretty serious about those olive trees. Besides, Shin didn't break a single branch landing an F-5A, so it would be a shame to spoil his effort by using a rocket-booster for takeoff. 😄
20 April 2020, 03:30


